Procedure: How to Configure License Codes for Optional Products
-
Click Utilities and
then License Management. The License Management
window appears with license code fields for InfoAssist
for MR, Mobile Favorites, Personal
InfoAssist, Power Painter, Quick Data, WebFOCUS Magnify, and WebFOCUS
Web Services. If you specified a value for the WebFOCUS Magnify
license code during installation, then that value is already populated.
The following image shows the License Management window with no
values populated.
Note: The
License Management menu option only appears if you have purchased
the Comprehensive User Services license for Managed Reporting or WebFOCUS
Magnify.
-
Type the InfoAssist license code
in the InfoAssist for MR field.
-
Type
the Mobile Favorites license code in the Mobile Favorites field.
-
Type the Personal InfoAssist license
code in the Personal InfoAssist field.
-
Type
the Power Painter license code in the Power Painter field.
-
Type
the WebFOCUS Quick Data license code in the Quick Data field.
-
Type the WebFOCUS Magnify license
code in the WebFOCUS Magnify field.
-
Type the
WebFOCUS Web Services license code in the WebFOCUS Web Services
field.
-
Click Save to
save your changes.
You
must reload your WebFOCUS Web application
in order for your changes to take effect. In addition, if you have
enabled the InfoAssist, Power Painter,
Quick Data, or Mobile Favorites features, users must log out of Managed
Reporting and log back in.
Reference: Accessing License Information for Third-Party Software
The
WebFOCUS product uses various third-party software for use with
different features. You can access the license information for each
software vendor by selecting Utilities, License
Management, and then3rd Party Information.
The
following information is available for each third-party software:
-
Description. Name
of the software.
-
License Type. Enables
you to view the license agreement for each third-party software
that is packaged with the product.
-
Component Name. Name
of the software file.
-
Product Name. The
Information Builders product that uses and packages the third-party
software.
-
Third Party Link. Enables
you to access the Web site of the software vendor for further information
on the third-party product.
Reference: InfoAssist Settings
In the
InfoAssist Properties menu under the Utilities section, the WebFOCUS
Administrator can enable or disable reporting options in the InfoAssist
tool by specifying Yes or No in
the Setting column. For more information on the InfoAssist reporting
tool, see the WebFOCUS InfoAssist User’s Manual, Version 7
Release 6.10.
Home Tab
In InfoAssist,
the Home tab enables you to control the most commonly used properties and
options from the Format, Design, Filter, and Report groups. The
WebFOCUS Administrator can configure the following properties available
in the InfoAssist Home tab:
- Page Heading
-
Adds a heading to each page of the report output. Page Heading
settings are configured in the Head/Foot menu of the Home Tab.
- Record Limit
-
If set to Yes, the Record Limit menu in the Home Tab
is enabled. If set to No, the Record Limit menu is removed
from the InfoAssist interface.
- Report Heading
-
Adds a heading to the first page of the report output. Report
Heading settings are configured in the Head/Foot menu of
the Home Tab.
- Themes
-
This option provides you with various color-coded WebFOCUS
StyleSheet themes that can be used to style your report or chart.
You can select themes that are standard with InfoAssist, or select
a customized Cascading Style Sheet theme created by you or someone
else in your organization.
- Use Interactive Design View
-
When set to Yes, the InfoAssist tool opens with Query
Design View as the default. When set to No, InfoAssist starts
with the Interactive Design View. If the Allow User Override Setting is
checked for this option, the InfoAssist user can change the default
settings specified by the WebFOCUS Administrator.
Format Tab
In
InfoAssist, the Format tab provides different options for selecting
output formats and other reporting features, depending on whether
you are creating a report query or a chart query. For reports, the
Format tab provides access to the Output Types, App Ribbon, Destination,
Navigation, and Features groups. The WebFOCUS Administrator can
configure the following properties available in the InfoAssist Format
tab:
- Active Flex Format
-
Creates report output that contains portability and interactive
enhancements to Active Reports.
- Active PDF Format
-
Creates report output that contains portability and interactive
enhancements to Active Reports in PDF format.
- Active Report Format
-
Creates an HTML Active Report, which is a self-contained
report that is designed for offline analysis. It contains all of
the data and JavaScript within the HTML output file and it includes
analysis options such as filtering, sorting, and charting.
- Excel Format
-
The Excel 2000 format supports most StyleSheet attributes,
allowing for full report formatting. The computer on which the report
appears must have Microsoft Excel 2000 or higher installed.
- Excel Pivot
-
Creates a report that will be displayed as an Excel 2000 PivotTable.PivotTable
is an Excel tool for analyzing complex data, much like WebFOCUS OLAP.
- HTML Format
-
Creates the report output as an HTML page.
- Other Chart Types
-
Provide options for creating more complex graph output types,
such as Spectral Map, Gauge Chart, and Pareto Chart.
- Pages on Demand
-
Displays report output one page at a time. You can use the
navigation menu at the bottom of the output screen to view each
page. This option is activated only when HTML or Active Report output
format is selected.
- PDF Format
-
Creates a report that will be displayed as a PDF document.
- Powerpoint Format
-
Creates a report will be displayed as a PowerPoint document.
The computer on which the report appears must have Microsoft PowerPoint installed.
- Stacked Measures
-
Displays all numeric measure field names in the first column
of the report output with the corresponding numeric data values
displayed across time in a column for each selected time period.
The Stack Measures feature is activated only when HTML, Excel, or
PowerPoint output format is selected. If the Allow User Override Setting is
checked for this option, the InfoAssist user can change the default settings
specified by the WebFOCUS Administrator.
View Tab
Enables
you to customize the view of different report components in the
InfoAssist tool, such as the design mode, output location, and data
view. The WebFOCUS Administrator can set the following properties
in the InfoAssist View Tab:
- Display View Tab
-
If set to Yes, the View Tab and all of the menu options
is enabled. If Set to No, the View tab is removed from the
InfoAssist interface.
- Query Panel
-
Allows you to customize the view of the query's components,
such as Filters, Column and Row labels, and Measures when building
a report. Values are 2x2 (2 columns by 2 rows), 1x4 (1 column by
4 rows), and Tree. If the Allow User Override Setting is
checked for this option, the InfoAssist user can change the default settings
specified by the WebFOCUS Administrator.
Tool Options
Enables
you to change the default settings to reflect the InfoAssist user's
preferences. If the Allow User Override Setting is checked
for an option, the InfoAssist user can change the default settings
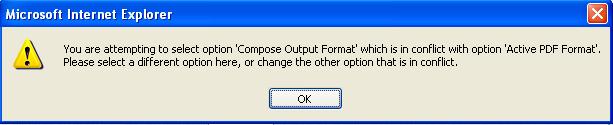
specified by the WebFOCUS Administrator. However, the WebFOCUS
Administrator can not specify a default value that has already been
disabled in one of the other Groups. For example, if the administrator
has disabled the Active PDF format (APDF) in the Format
tab section and attempts to set that format as a default
Compose Output Format in the Dialog Defaults section,
the following message displays:
- Chart Output Format
-
Sets the default format for chart outputs. Valid values are
PDF, and EXL2K, PPT, and PNG.
- Compose Output Format
-
Sets the default format for report outputs that are generated
in Compose mode. Valid values are Active PDF, PDF, Active Report,
HTML, Excel, Active Flex, and PowerPoint.
- Data Preview Method
-
Allows you to preview your report using sample data (Sample)
or retrieve actual data from the datasource (Live).
- Output Target
-
Sets the default value for the location of your report or
chart output. Values are Single Tab, New Tab, Single Window, and
New Window.
- Page Orientation
-
Enables you to print reports and charts using a Portrait
or Landscape page layout.
- Page Size
-
Enables you to set the page size when printing your report
or chart output.
- Preview
-
Enables you to preview your report or chart output using
the Interactive Design mode or Query mode.
- Recordlimit
-
Limits the number of rows retrieved from the data source
when Interactive Design view is selected. This feature is useful
in reducing response time if you are working with a large amount
of data. It is applicable only when developing your report. The
record limit setting will not affect the report output at runtime.
- Report Output Format
-
Enables you to specify a default format for your report output.
- Splash Screen
-
Specifies the startup mode for the InfoAssist tool. When
set to splash, the splash screen is launched every time InfoAssist
is started. When set to report , chart, or compose,
the Open dialog box displays where you can
select a data source to use for your query.
- StyleSheet
-
Enables you to specify a default stylesheet for your report output.
Miscellaneous
- Expand Data Source Tree
-
Enables you to view all data source values in the tree.
If set to Yes, the tree is expanded by default. If set to No,
the tree is collapsed by default.
- Join Button
-
Enables you to join several datasources in your query. If
set to Yes, the Join menu option is enabled under the Data
tab. If set to No, the Join menu option is removed from the
Data tab.
- Layout Tab
-
Enables you to set several page layout options, such as page
orientation, size, and numbering for your report or chart output.
If set to Yes, the Layout tab is enabled in the InfoAssist
control panel. If set to No, the Layout tab is removed from
the InfoAssist control panel.
- Series Tab
-
The Series tab is enabled only when working with chart queries.
It provides access to charting properties and options in the Properties,
Line, and Pie menus. If set to Yes, the Series tab is enabled in
the InfoAssist control panel. If set to No, the Series tab
is removed from the InfoAssist control panel.
Procedure: How to Configure Managed Reporting Tool Types
-
Click Utilities.
The MR Tool Type options appear.
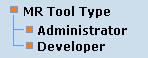
-
Select Administrator or Developer.
The MR Tool Type Selection window appears with the Java
Swing applet-based ReportCasterUser Interface selected by default.

Note: The ReportCaster User Interface
cannot be configured for Managed Reporting Analytical Users, who
must use the HTML-based Scheduling Wizard and User Interface.
-
To configure
Managed Reporting administrators or developers to use the HTML-based
Scheduling Wizard and User Interface, select the HTML option
button.
-
Click Save to
save your changes.
You
must reload your WebFOCUS Web application
in order for your changes to take effect. In addition, users must
log out of Managed Reporting and log back in.
Procedure: How to Extract MR Change Management Packages
To
extract MR Change Management Packages:
-
Log on to the WebFOCUS Administration
Console in the environment where you want to create a change package.
-
Click Utilities. The MR Change Management Extract
and Load options appear.
-
Select Extract to create a change package.
The Change Management Extract Utility login screen appears.
-
Enter a valid Managed Reporting Administrator or Developer
user ID and password.
The Change Management Extract Utility appears as shown
in the following image.
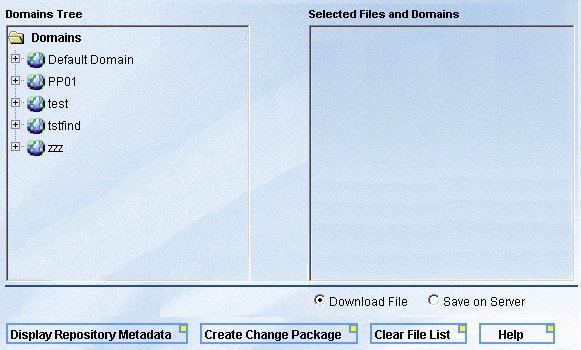
-
To create a change package, expand the folders in the Domains
Tree and select individual items from a domain or the contents of
an entire domain.
You can single-click (or drag and drop) one or more items
from a domain.
You can double-click (or drag and drop) a domain
to select all content. Properties of a domain are not propagated
by the change management process. Note that a selected domain is
a collection of content of the domain, and not a complete clone
of the original domain.
When you select an item or domain,
it appears in the Selected Files and Domains pane. If you select
duplicate items or domains, they are only added to the change package
once. You should not select individual items from a domain that
is already selected.
-
If you need to remove an item or domain from the Selected Files
and Domains list, select the item and press the Delete key.
To remove all items and domains from the Selected Files
and Domains list, click the Clear File List button.
-
By default, the Download File option is selected. Click Create
Change Package to download the change package to your
browser. You will then have the option to open it or save it locally,
as shown in the following image.
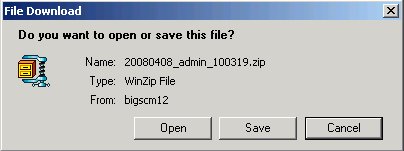
The
naming format for the change package is: YYYYMMDD_admin_HHMMSS.zip. The
format is Java Zip (which is WinZip compatible). If you have WinZip
installed locally, open the change package. To ensure that the Change
Management utility recognizes the file and processes it correctly,
do not change the file name or the .zip file extension.
The
contents of the change package includes the extracted file(s) and
a cmRepos.xml document that contains metadata about the file(s),
such as their internal references and properties.
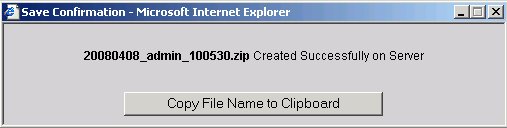
If you select
the Save on Server option, the following window opens to provide
you with the name of the change package created on the server.
If
you are a Managed Reporting Administrator, consider whether you
want developers to download and e-mail change packages to a coordinator,
or create the packages on the Web server platform. Packages created
on the server are written to install_dir/WebFOCUS76/utilities/cm/extract.
If authorized, you can change this location by editing the WebFOCUS
deployment descriptor (web.xml) and changing the value of the context-parameter
MRCMEXTRACTDIR. The directory specified by this setting must exist
and be writable by the servlet container. You may want to have developers
create the package on the server and also download and e-mail them
to a coordinator. This may help audit the change process since you
have a record of the intent of the developer, and can load the packages
from a controlled location.
Note: To ensure that the
contents of a change package are not altered in any way, it is recommended
that you always load change packages that were created with the
Save on Server option.
-
If you are a Managed Reporting Administrator, select Display
Repository Metadata to open a window where you can view
and extract metadata from the Repository for analysis.
You can also query the Repository for metadata if desired.
This may be helpful in planning or debugging.
For more information about the output
generated from these options (Users, Roles, Groups, Domains, Domains
Contents), see the Managed Reporting Extract Utility chapter
in the WebFOCUS Managed Reporting Administrator's Manual.
-
Click Logout.
For more information about the change
management process, see the Change Management chapter
in the WebFOCUS Managed Reporting Administrator's Manual.
Procedure: How to Load MR Change Management Packages
To
load MR Change Management Packages:
-
Log on to the WebFOCUS Administration
Console in the environment where you want to load the change package
that was created with the Change Management Extract Utility.
-
Click Utilities.
-
Select Load (below MR Change Management) to
load a change package.
The Change Management Load Utility login screen appears.
-
Enter a valid Managed Reporting Administrator user ID and password.
The Change Management Load Utility appears, as shown in
the following image, and displays any folders in the \utilities\cm
directory that contain .zip files.

-
To load a change package, select the desired .zip file change
package in the Available Change Packages pane to add it to the Selected
Change Package pane.
The available options you can select include Overwrite
duplicates (default), Backup packages (available only when Overwrite
duplicates is selected), Preserve Creation info, and Preserve Modifier
info.
-
To remove a selected change package from the Selected Change Packages
list, select the item and press the Delete key. To remove all selected
change packages, click the Clear File List button.
-
Click Load Change Package to load the
change package into the MR repository of your target environment.
Note: You can click the Open Log File button to
view the contents of the cmevent.log file that was created in the
\utilities\cm directory. It contains helpful information about the
success or failure of the load process.
-
Click Logout.
For more information, see the Change
Management chapter in the WebFOCUS Managed Reporting Administrator's Manual.